

CLICK FOR LARGER IMAGE
SORTED NEWEST TO OLDEST
11/19/2013 Update from Sheila Doyle.
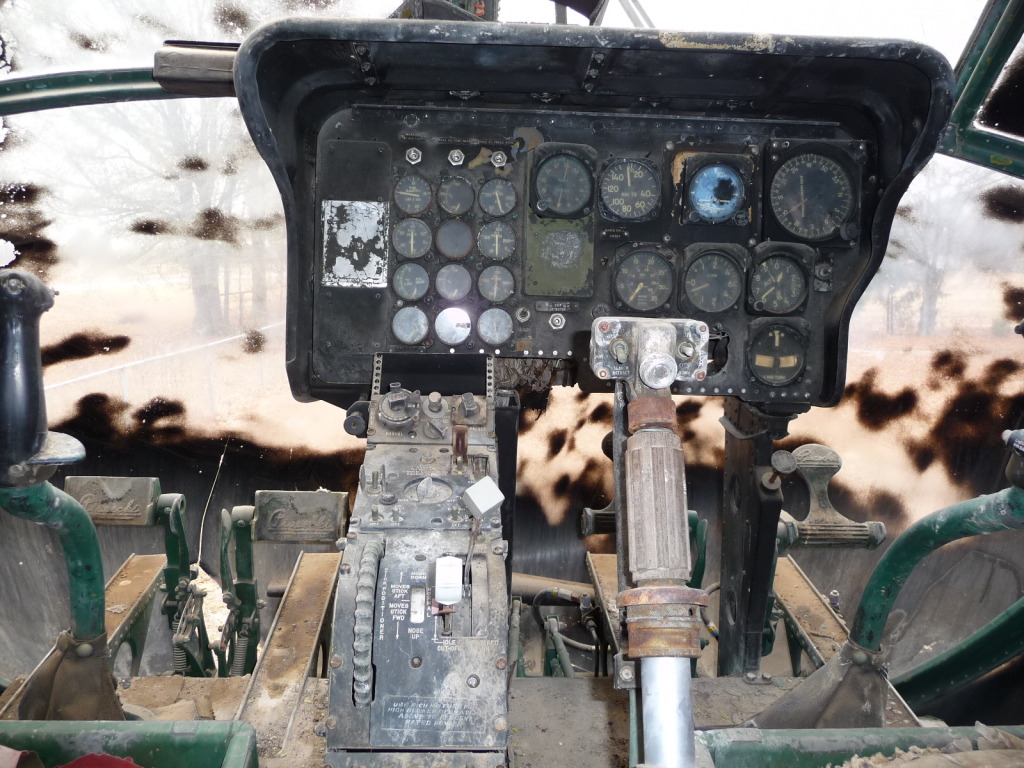
Big news! We got the LH seat out thru the sliding window. We have started work on removing the instrument panel.
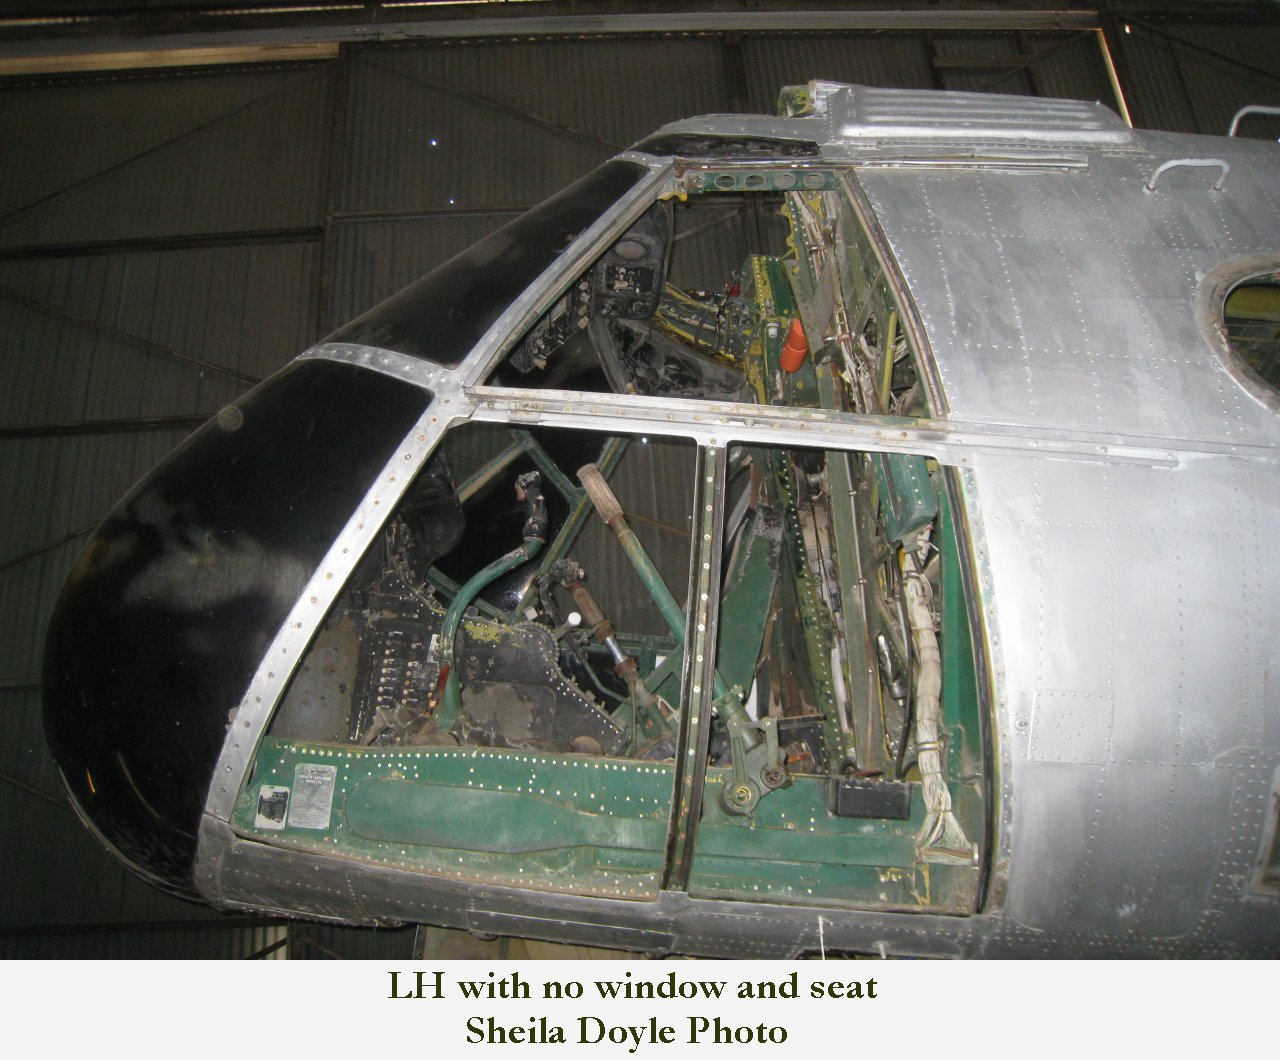
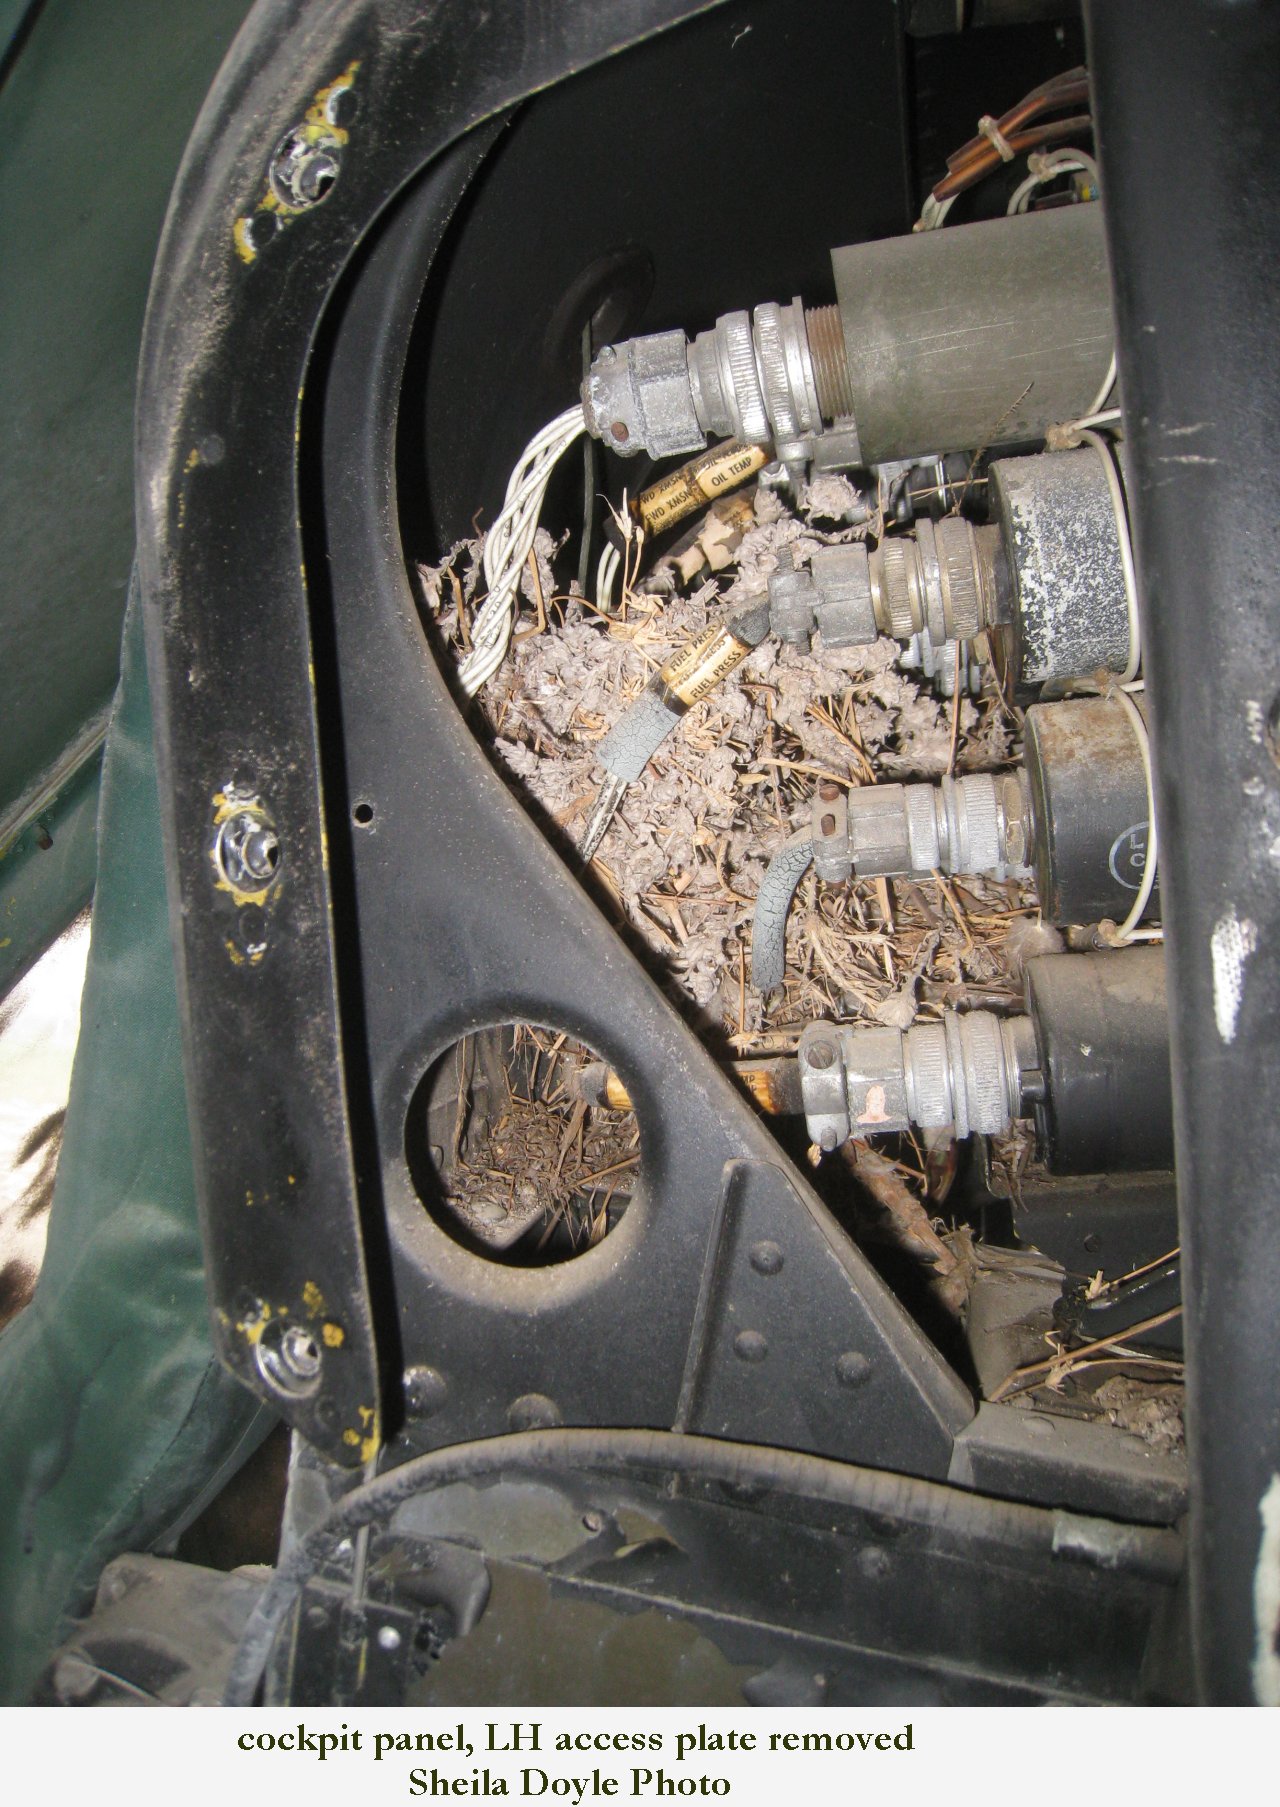

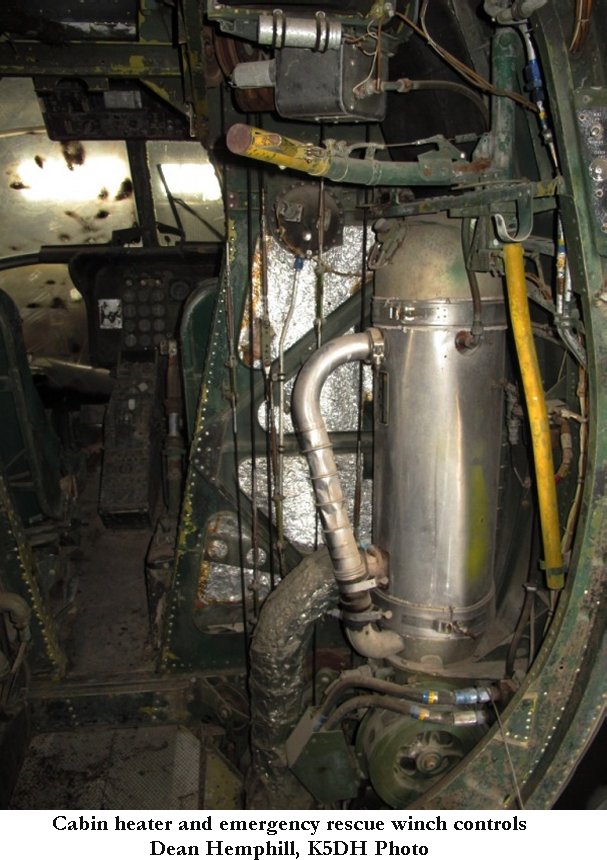


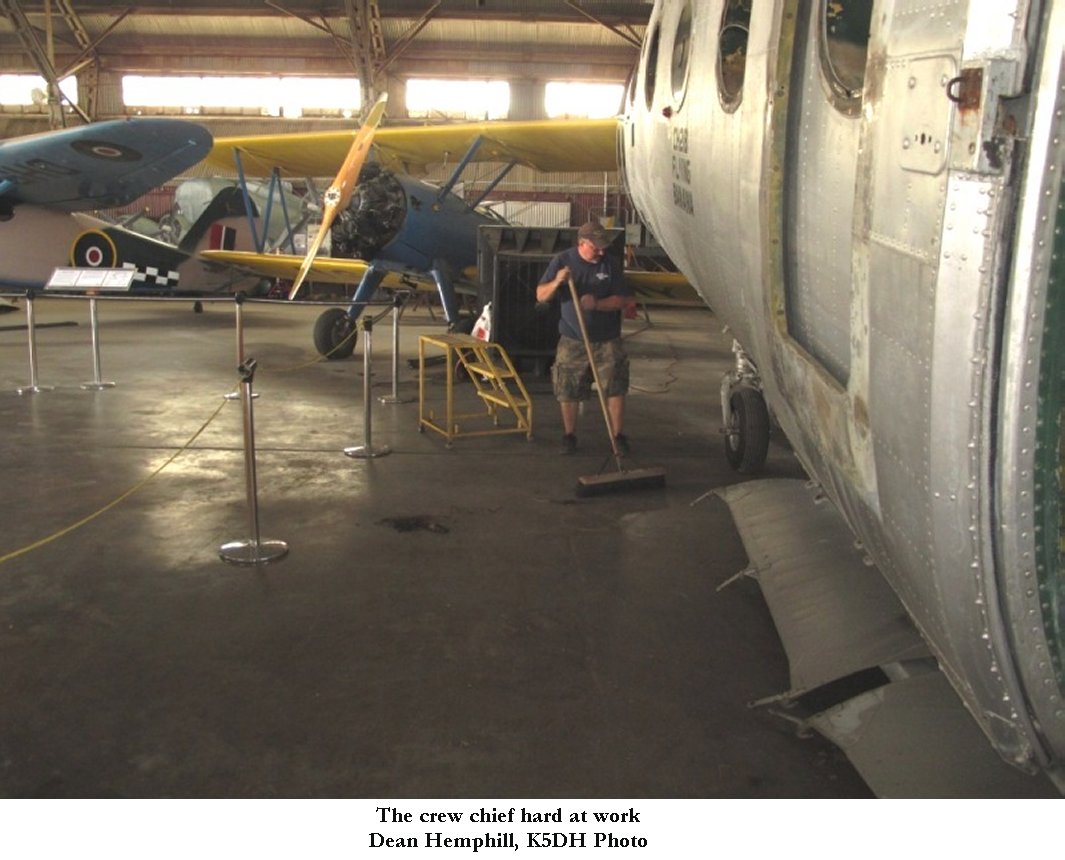
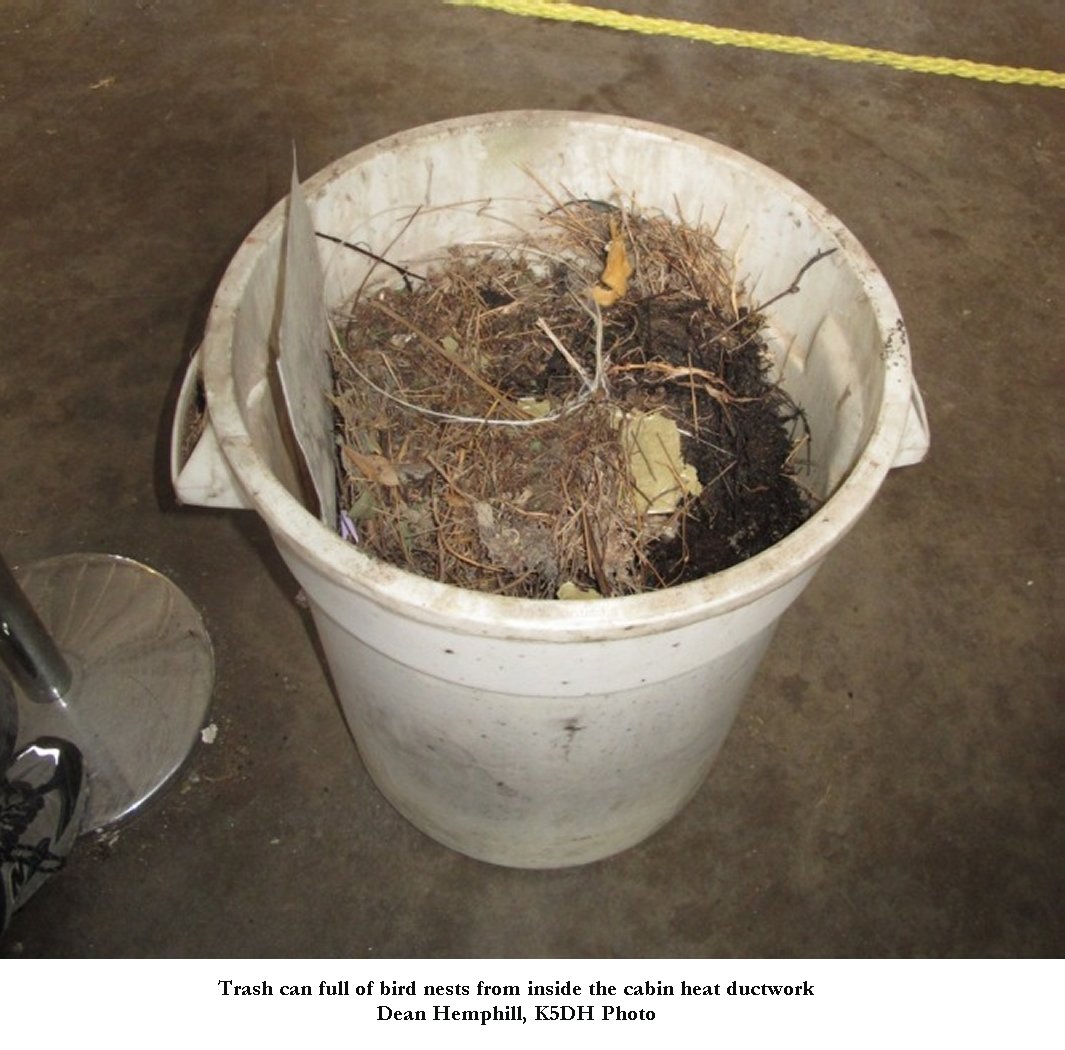
Here is a quick update from Sun Jun 23, 2013, with some photos. It was insanely hot and humid in the hangar today. At least there was a breeze blowing (mainly blowing the dust around so that it would stick to our sweaty skin). Bill, Will, and I worked on Shaky much of the day. Bill spent his time removing windows from the left side of the fuselage. Some were plexi and some were sheet metal. Some were screwed in and some were riveted in. All were spray-painted black. All looked terribly ugly and had to go! Bill spent hours drilling out rivets and rusted screws. Will and I spent our time removing interior trimmings, including the huge ductwork that ran down the center of the fuselage ceiling and supplied heat to the cabin. It was chock full of bird nests. We also removed the cover over the cabin heater, the cockpit headliner, and some of the vinyl covers over the radio rack and part of the left front of the cabin. We filled a plastic trash can with bird nests (as you'll see in one of the photos). But, 42 years of bird nests are finally gone!
Dean Hemphill, K5DH
Shaky Magoo Restoration Update 24 JUN 2013
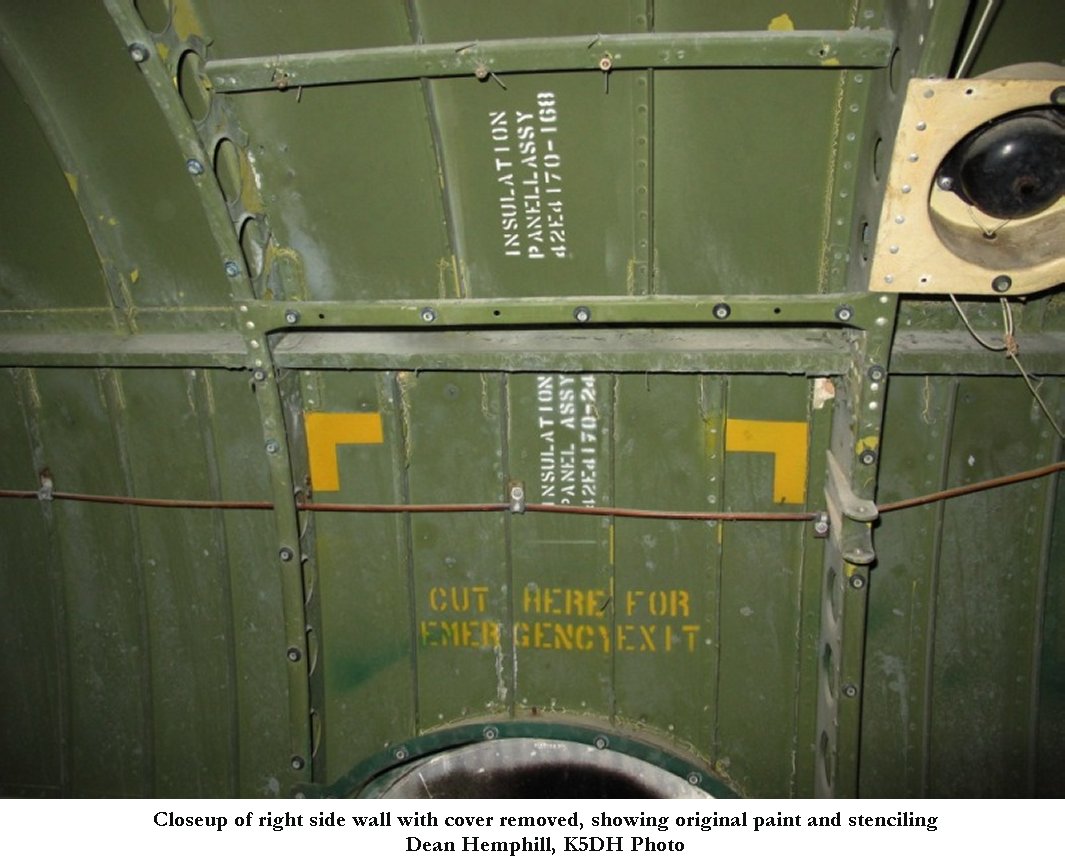
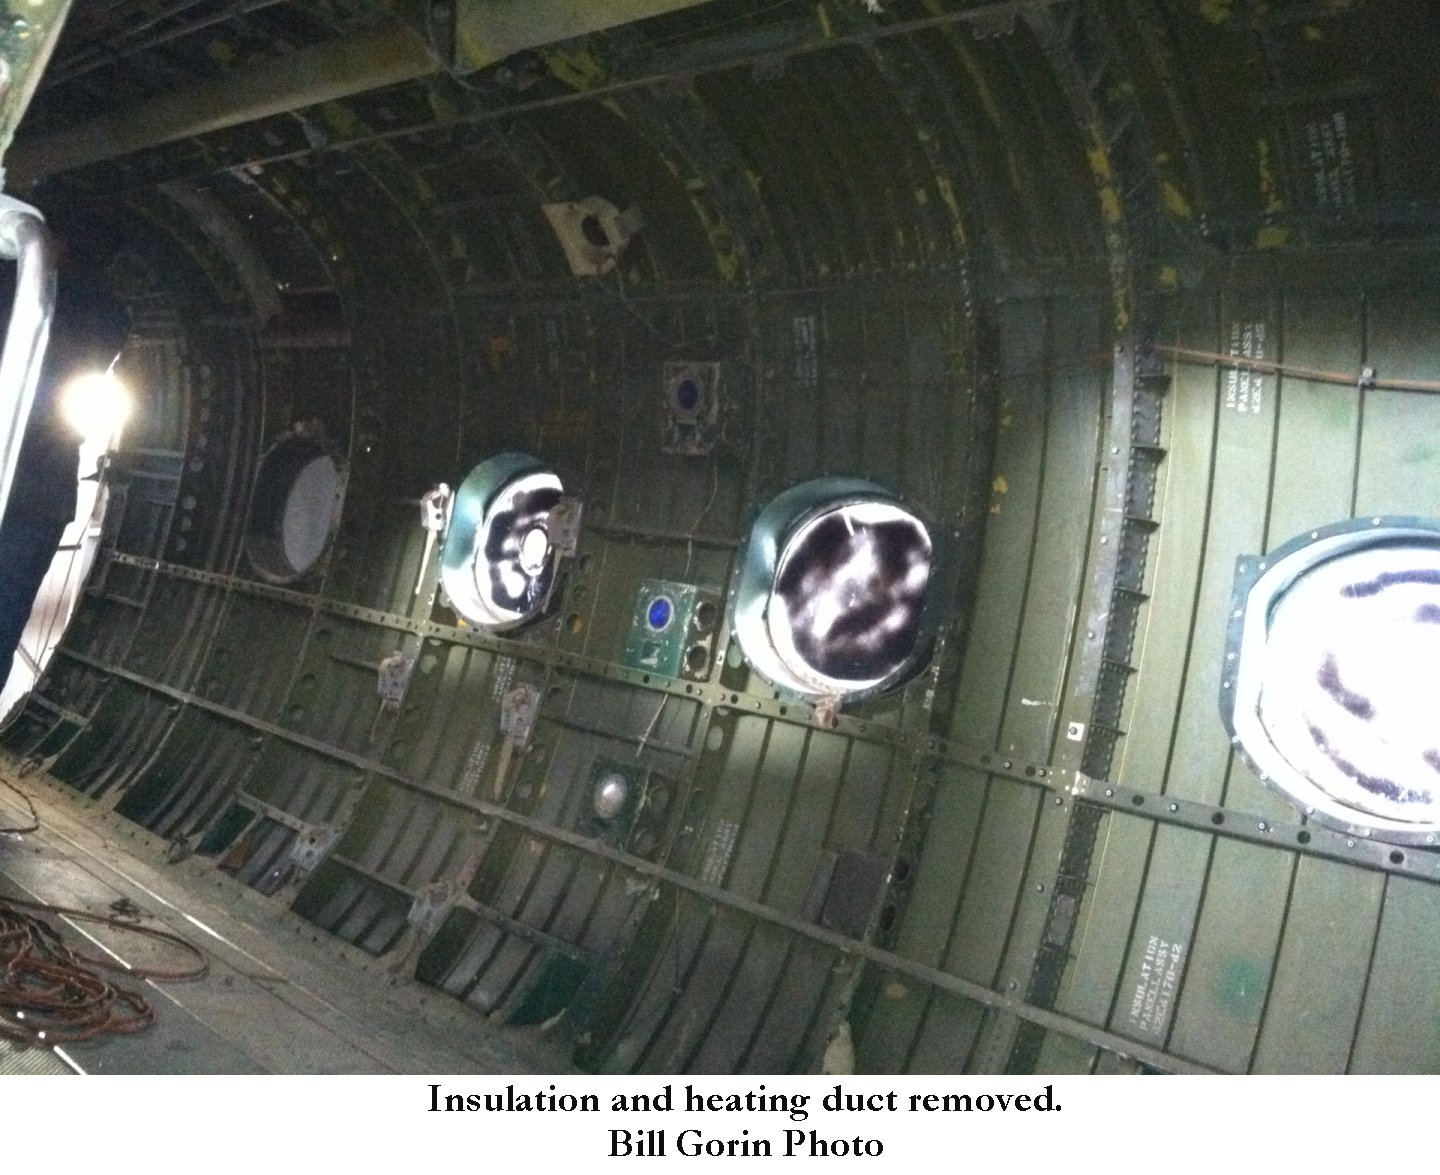
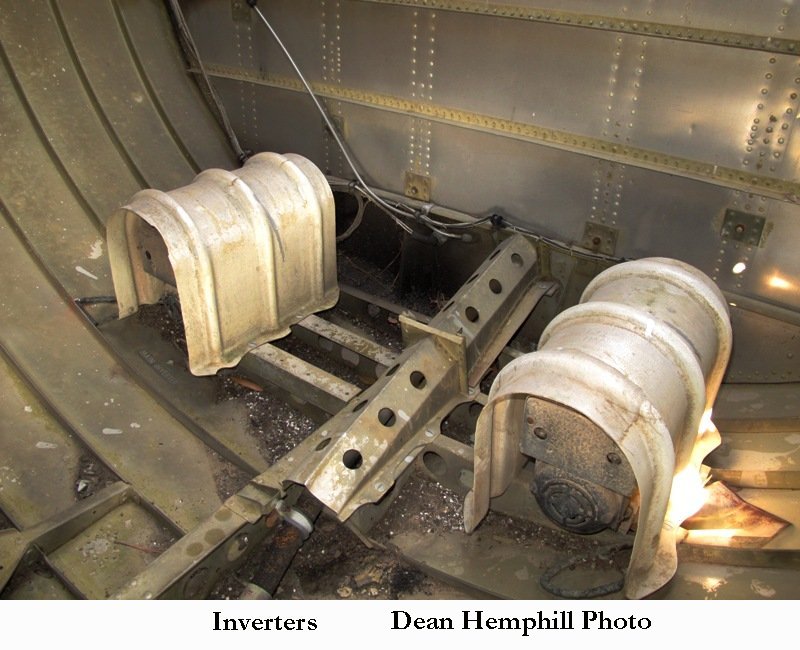
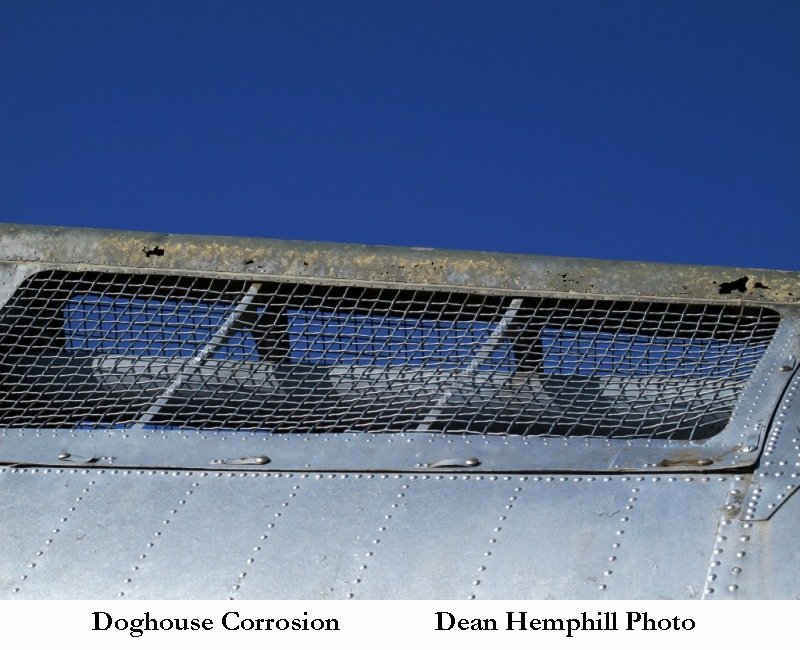
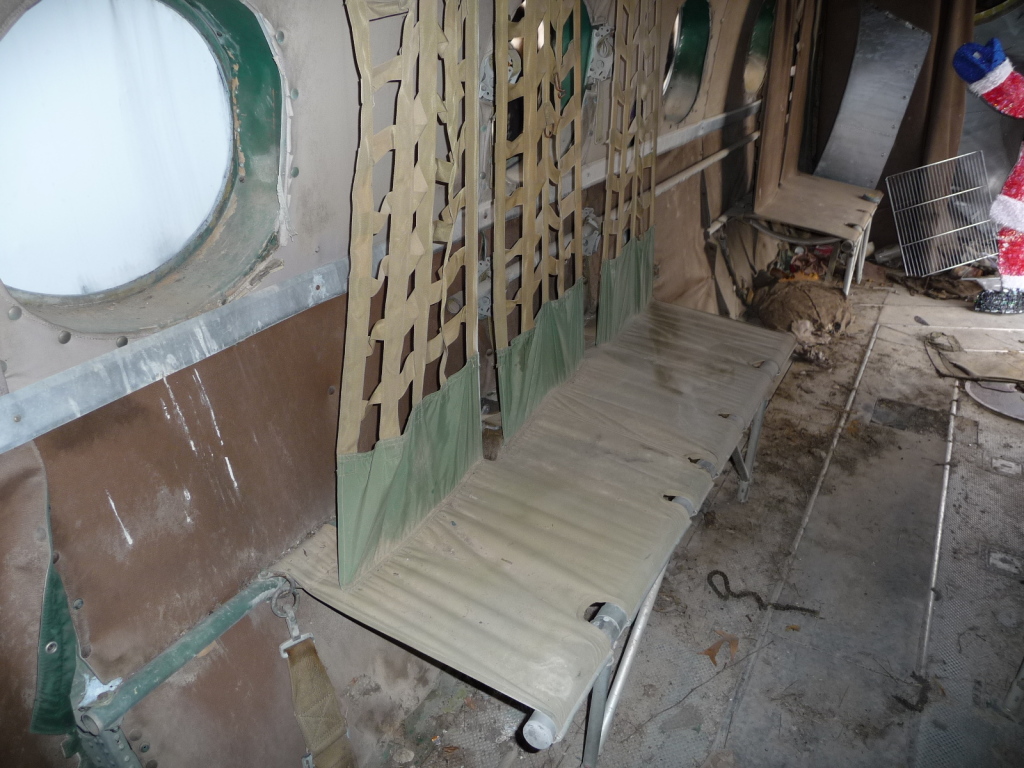
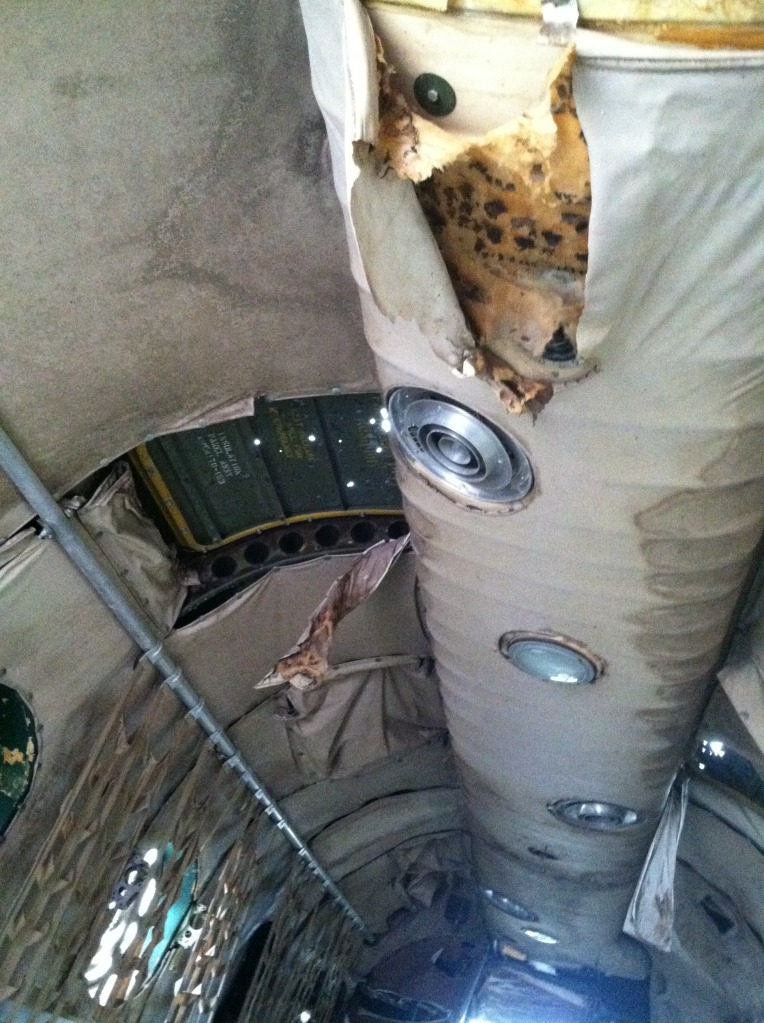
Work progressed on the CH-21 this weekend. Our newest volunteer Sheila Doyle continued with vacuuming and started removing the interior insulation on Saturday, she got the entire right side insulation removed. If you look at the attached photo that I took you can make out the stencils that tell you which insulation panels go where. The metal and the paint is in really good condition, except right along the top center of the fuselage where there is some corrosion. Nothing that we can't fix.
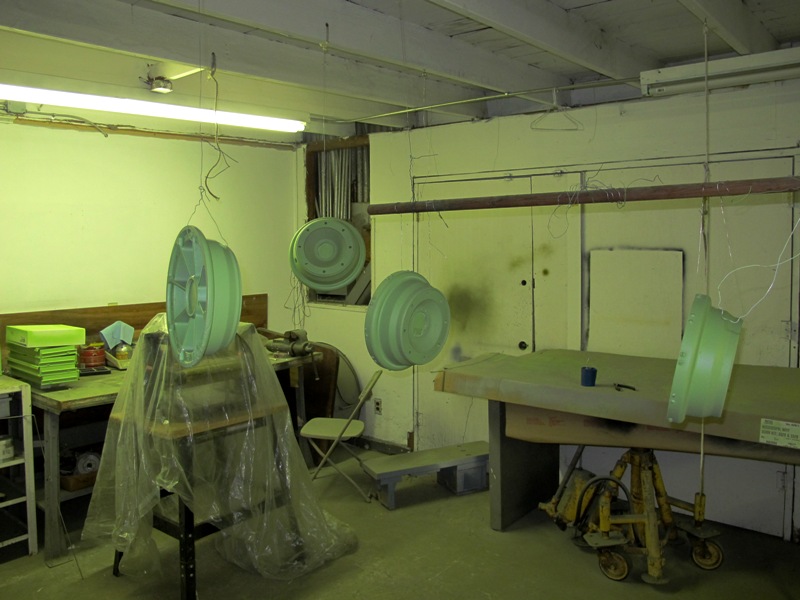
Today (Sunday), myself, Dean Hemphill and Will continued the work. Dean and Will removed the heater ducting that covers the shaft going to the forward rotor head, the interior panel that covers the heater and the cockpit headliner panels. I started removing the LH side cabin windows. I managed to get the cargo door 'window' removed as well as 5 of the 6 oval cabin windows-some of which were just sheet metal painted over. A couple of the sheet metal retainers that hold the Plexiglas in place are in pretty rough shape. Pate ground the heads off of the original screws and got into the retainers in the process, then they used automotive pop rivets to put them back on with sheet metal instead of Plexiglas. We will see if we can salvage the retainers, if not we will make more, they aren't difficult. We'll go back with clear, probably 1/8 inch Plexiglas.
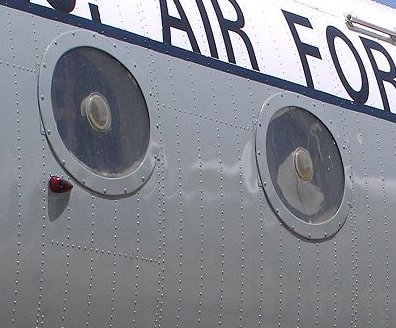
Question for the gurus; did the oval cabin windows have some sort of a round vent in the middle of them that could be opened and closed, similar to the cockpit?
YES, see right photo above-Jimbo-They popped out and rotated for airflow
Another question, what is the purpose of the blue lights on the RH side of the cabin? (you can see them in the attached photo, although the blue lens is broken on the bottom one).
I've ordered 200 of the 3x5 cloth parts bags with tags and drawstrings, they were $36.00-my donation. They should arrive in time for next weekend.
Next weekend's plan:
1 Remove the cabin LH side insulation panels
2 Vacuum interior
3 Finish removing the rest of the cabin windows (1 on the LH side and all of the RH side)
4 Vacuum out rotor head areas and aft rotor shaft area
Dean took some more pictures that he’ll hopefully share when he gets a chance.
Anyone that wants to come out and help is more than welcome to!
Bill Gorin
Chief of Maintenance
Vintage Flying Museum
Shaky Magoo Restoration Update 9 JUN 2013
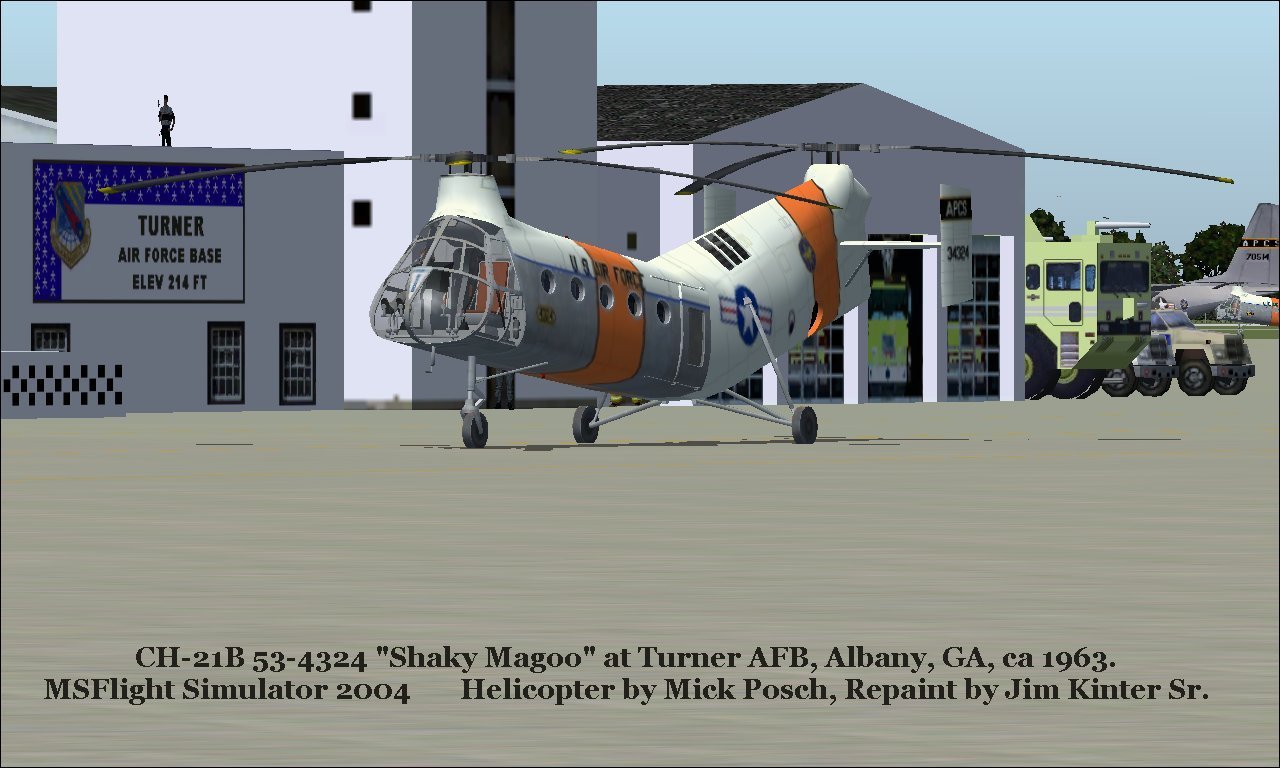
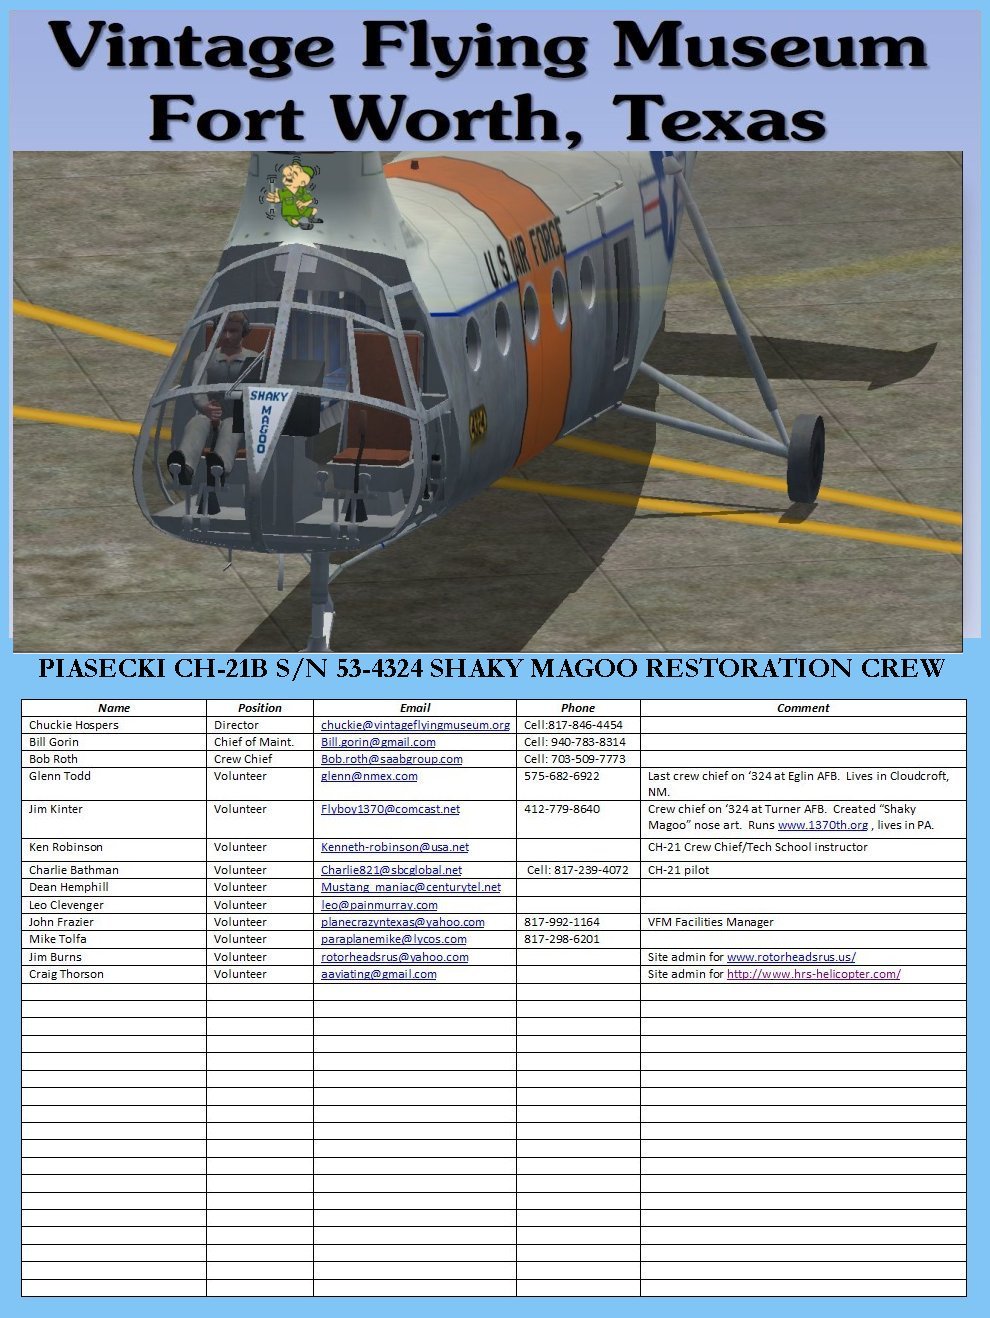
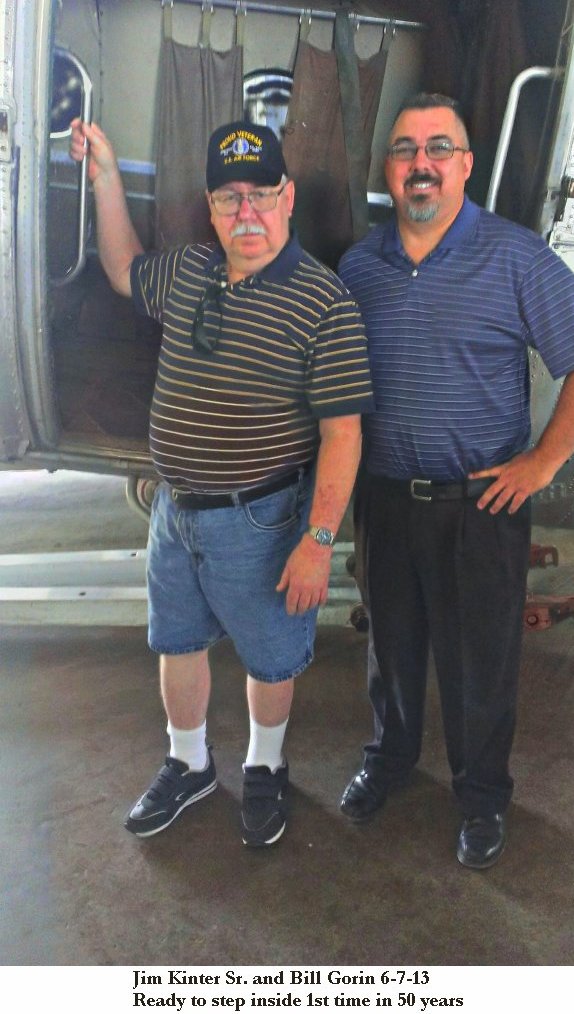
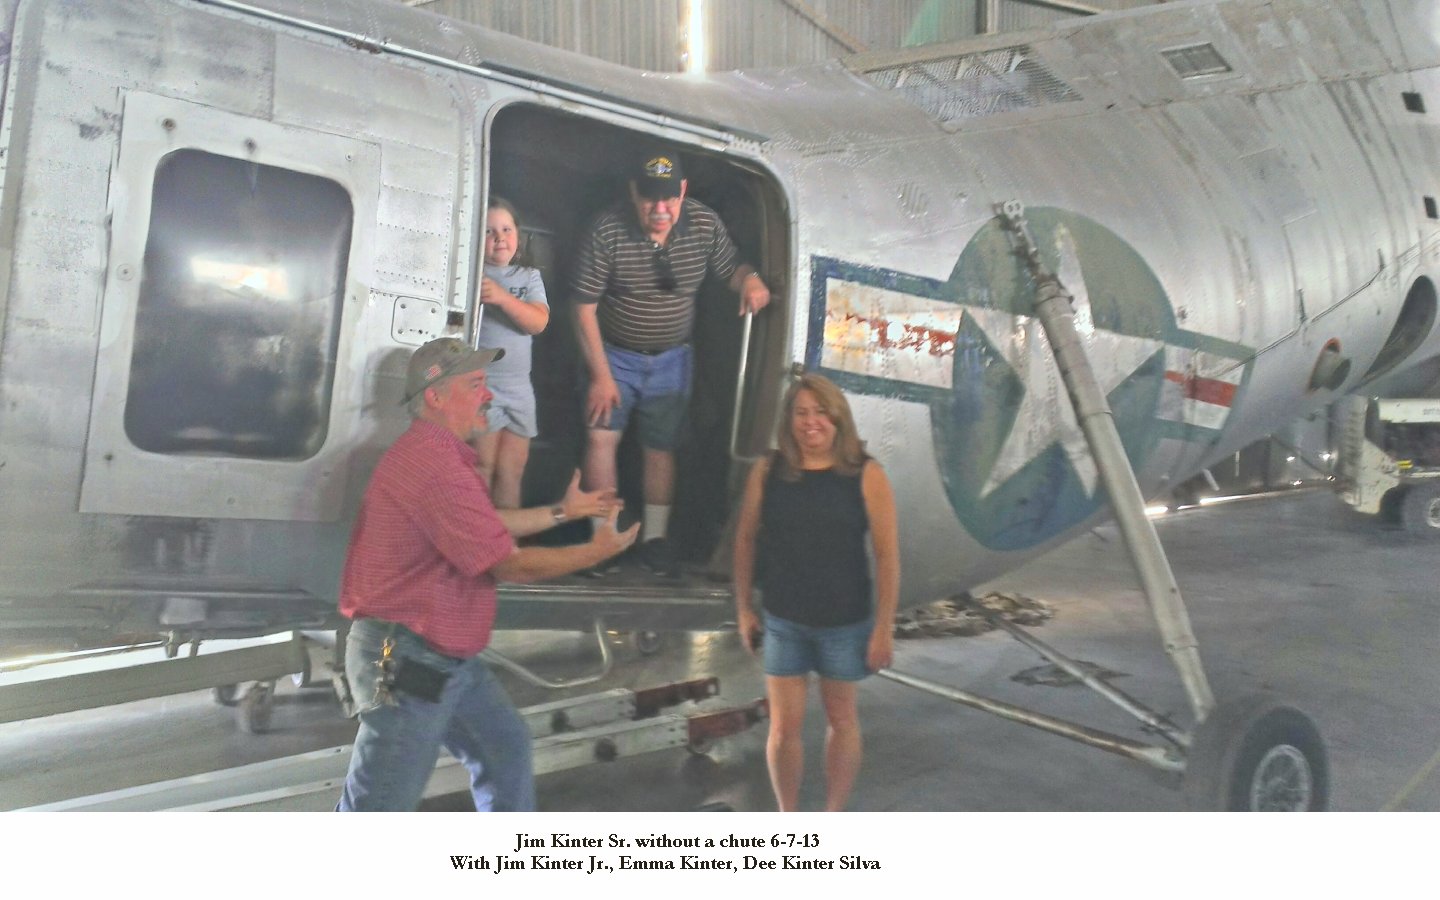
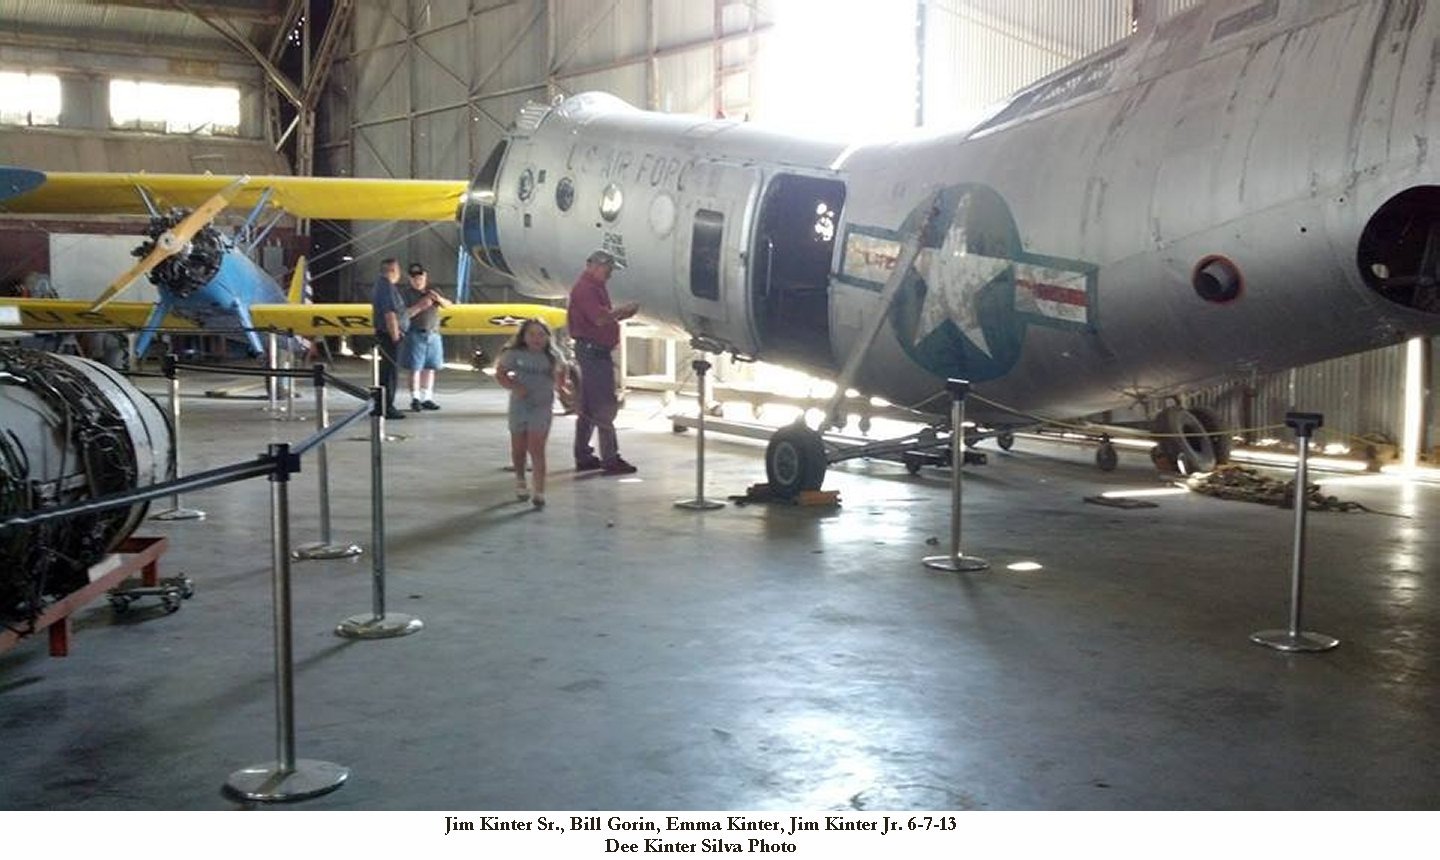
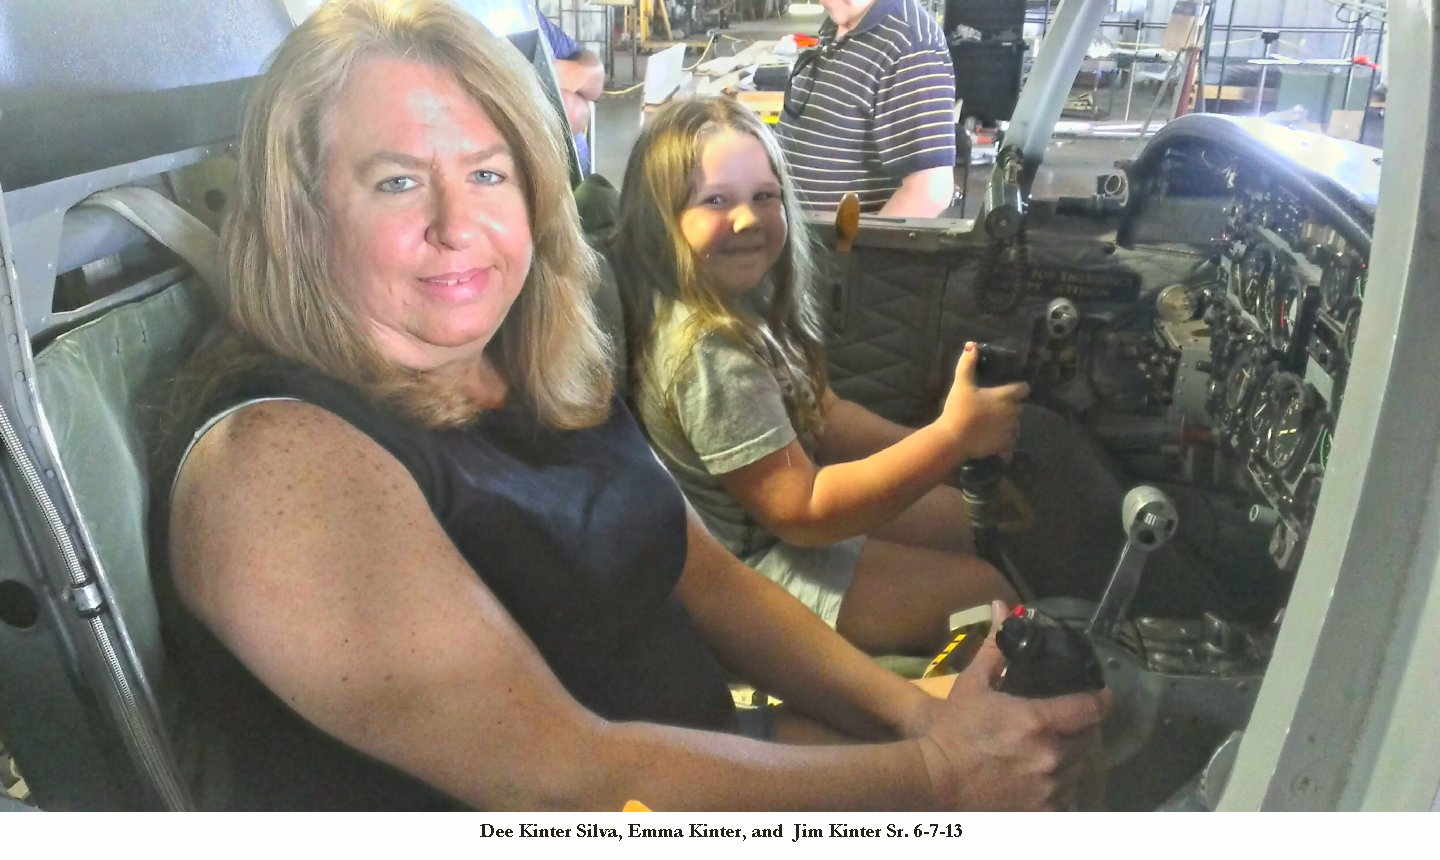
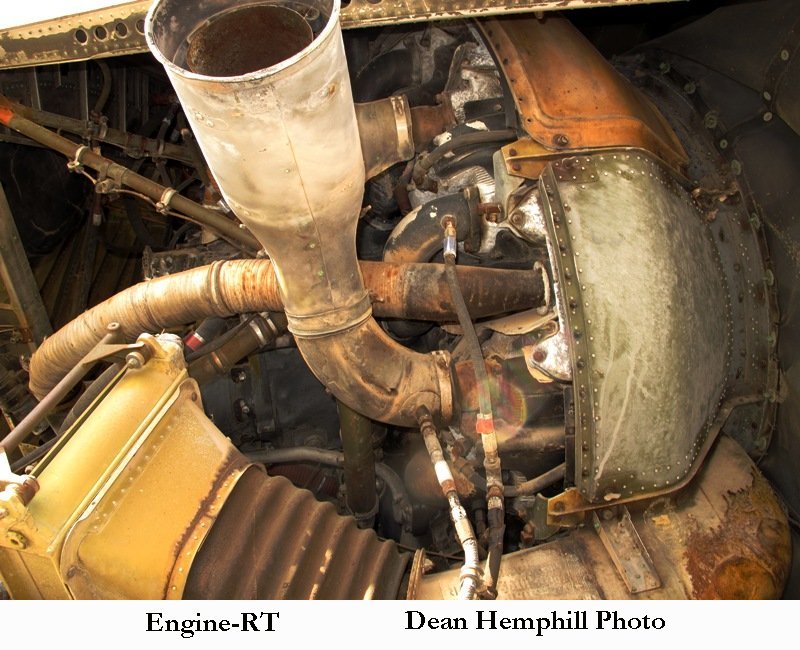
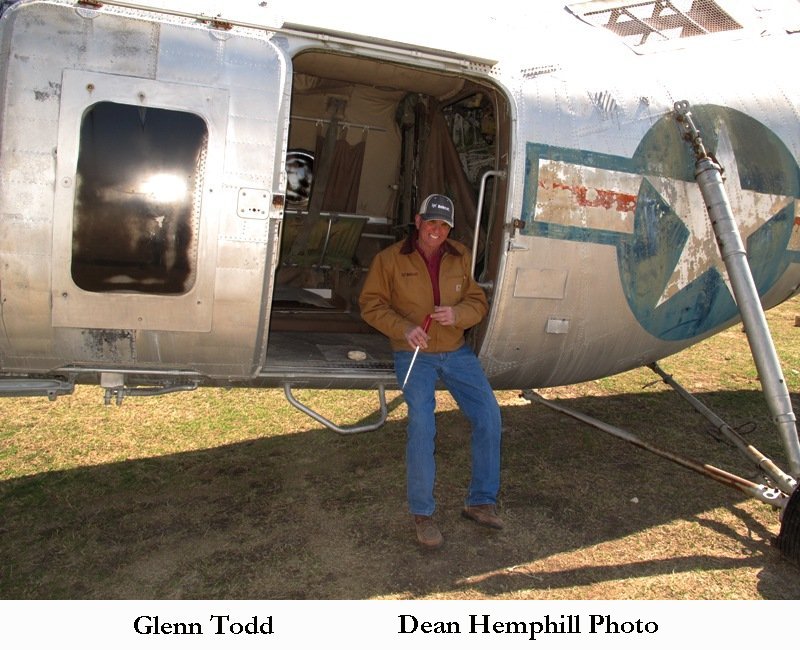
Hello again everyone, This weekend we got a good start on the restoration.See Project Plan above Saturday we started by getting a work area set up around the aircraft (work stands, parts racks, extension cords, lights, fans, etc.). Our newest volunteer Sheila Doyle jumped right in the fray and started vacuuming the inside out. I removed the engine bay doors, the "dog house" fairings over the aft rotor drive shaft. I opened the door on the bottom of the nose that gives you access to the all the control linkage under the cockpit. There were a lot of bird nests! The RH horizontal stab was FULL of bird nest and there was a lot up on top under the "dog house" fairings around the carb air filter. I photographed most of what we accessed as well as the interior for reference when we start putting this back together. I'm uploading the photos to Photobucket, so you can go on there and browse the photos, there are too many to email. Here's a link to the photo slideshow sorry for the quality of some of them, I just used an iPhone. After the fact, we realized that the shop vac that we were using was not sealing properly and we were blowing dust everywhere. The seal between the top and bottom is missing. I am going to see if I can find a replacement seal. I can also bring my shop vac from home, or we can buy a new one for the museum. Sadly we have 3 of them in the hangar and there is something wrong with each one of them - the joys of a "community" hangar. Here is what I would like to try to get done next weekend: Remove the troop seats Remove the interior lining Start removing the cabin side windows (I noticed that these have been previously replaced by Pate, and they replaced the screws with pop rivets in many cases - nice of them huh?) I plan on just replacing the Plexiglas and reinstalling them with the correct hardware. Continue cleaning the aft rotor shaft and rotor head areas There is plenty of work, so please come out and lend a hand. This really is a very cool and interesting project! Saturday morning we have the Aviation Career Education (ACE) Camp kids coming out for their "graduation" ceremony and to take flights as part of the EAA Young Eagles program. That will start at 8 am and be done by 11 or 12. That will be going on in the front of the hangar so we can still be working on the CH-21 in the back of the hangar. I had the pleasure of meeting Jim Kinter Sr. in person(see photos BELOW) on Friday, 7 JUN 2013 when he came to see our CH-21 "Shaky Magoo". Jim was a crew chief on it in the '60's while stationed at Turner AFB, GA in the 1370th Photo Mapping Wing, where he painted the "Shaky Magoo" nose art on the fwd rotor head cowl.
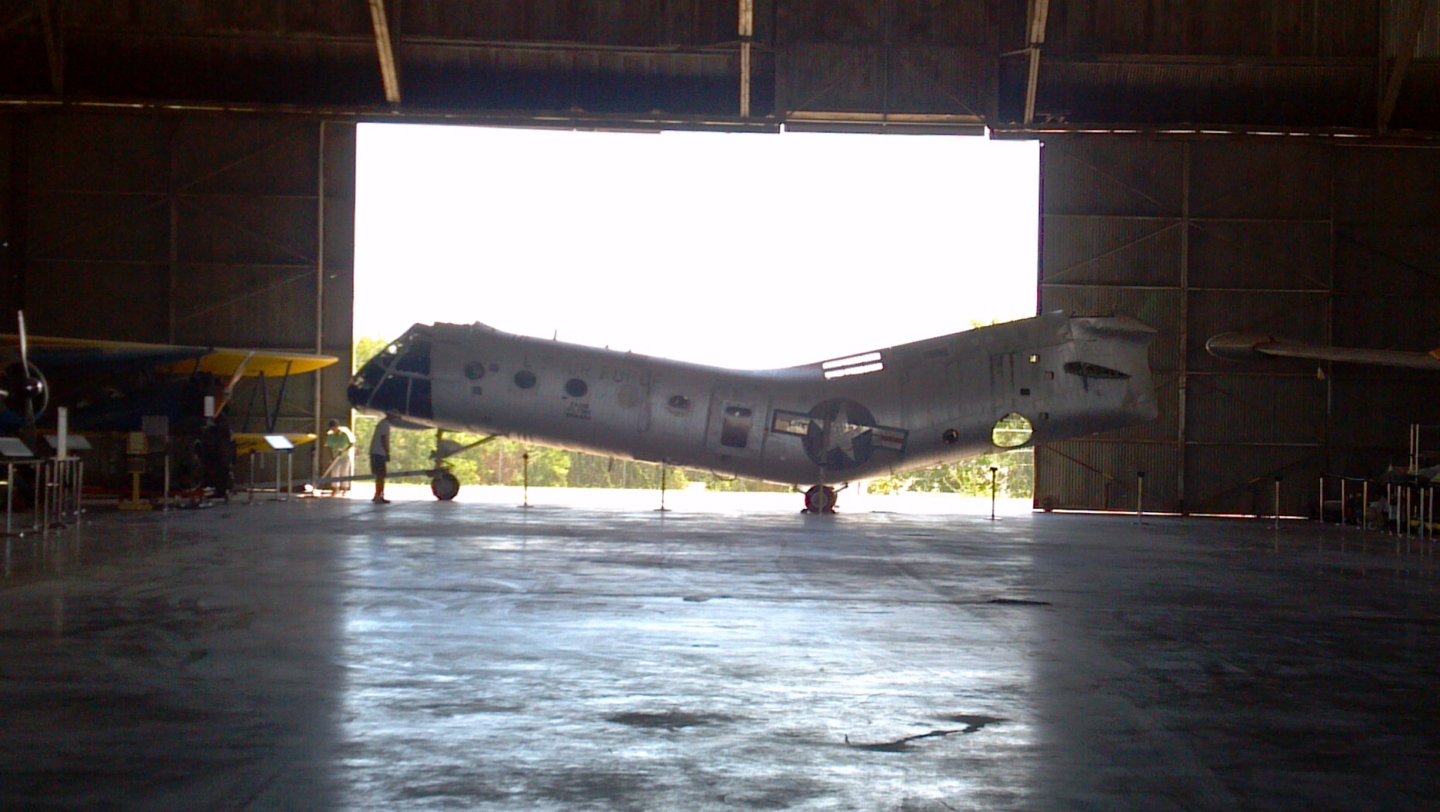
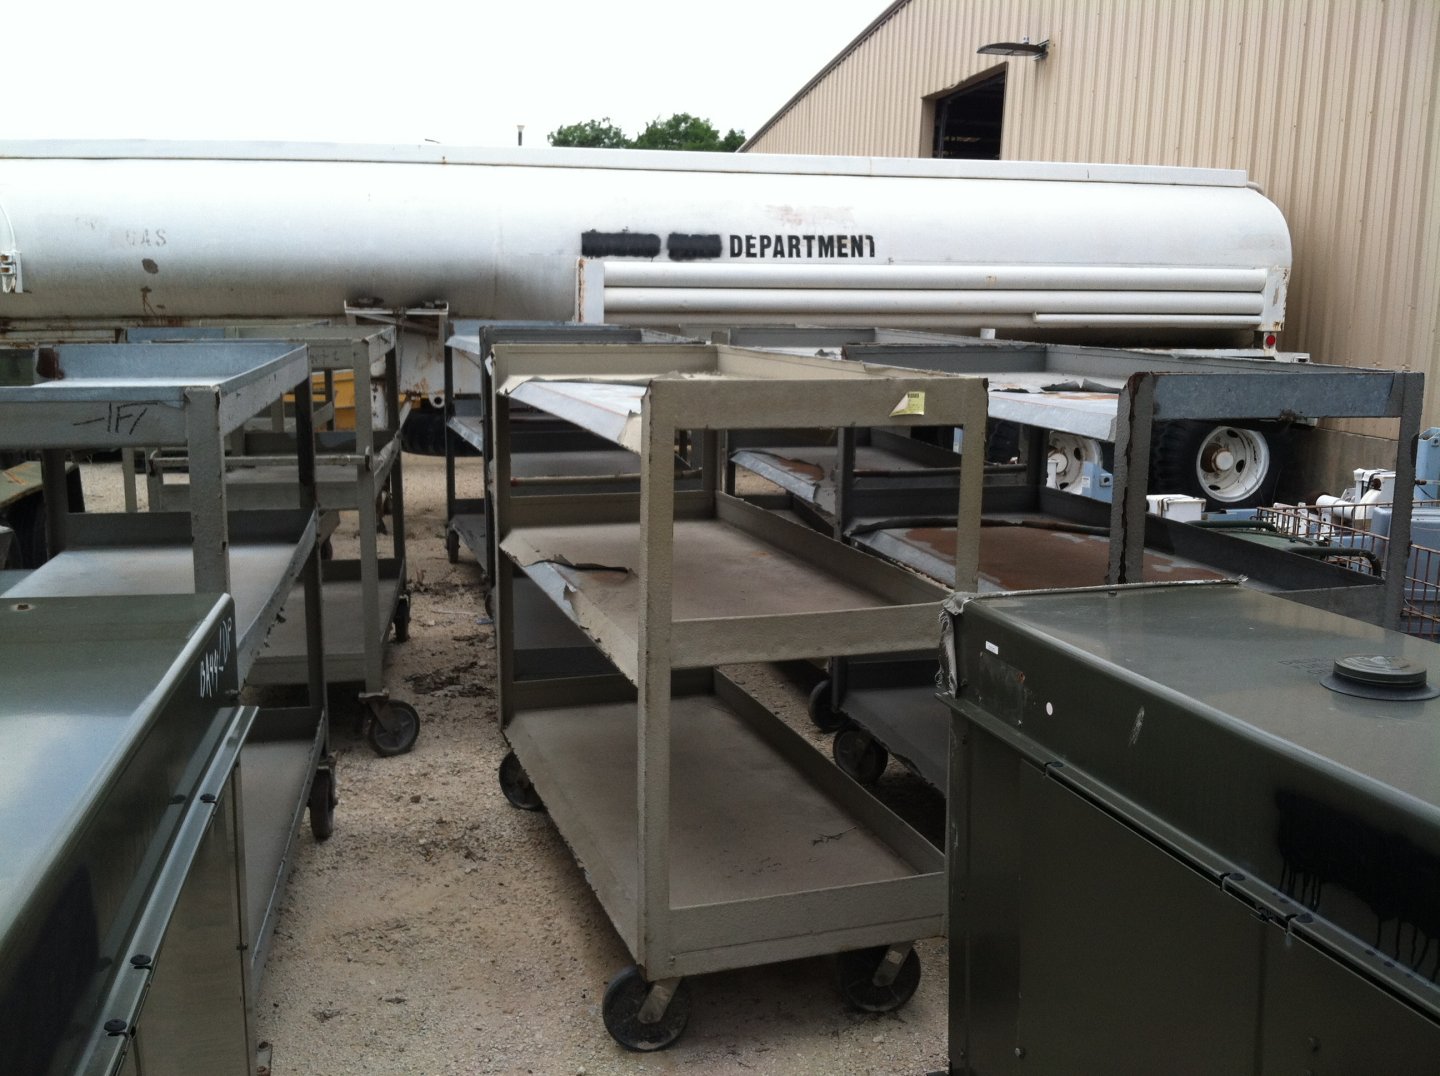
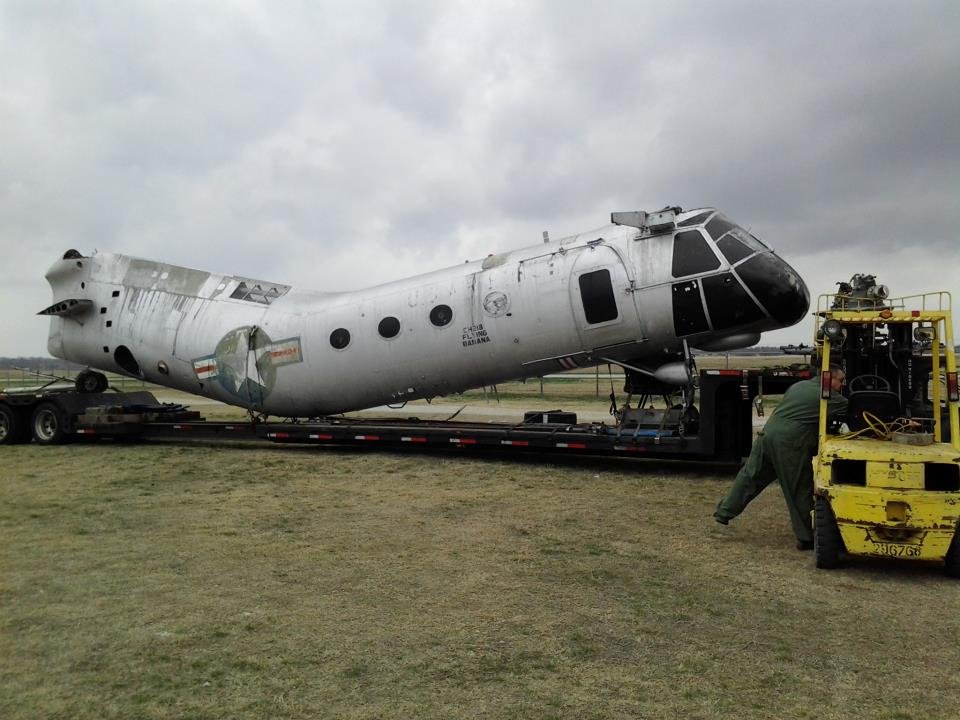
It's always a pleasure and an honor to meet the guys who have been there and done that! Friday was the first time that Jim had been inside "Shaky" in 50 years! He had visited it while it was at the Pate Museum of Transportation, but was unable to get inside it. Jim lives in PA now, but he is an integral part of the "Shaky Magoo Restoration Crew"! Jim runs the http://www.1370th.org/ website for all things USAF Photo Mapping. He has a special section of his website just for our (his) Shaky Magoo. Bill Gorin Chief of Maintenance Vintage Flying Museum Now that she's inside, we can get down to business on her restoration 6-3-2013-It was a long hot day, but we did it! Shaky Magoo is inside a hangar for the first time in over 40 years!! We also got 4 of the galvanized steel parts racks in the attached picture for just $75.00 each from the government surplus yard here in Fort Worth, so we have a lot of room to put parts and keep them organized. We still need some of the cloth parts bags I sent the link to in the previous email, so if anyone can buy some, we need about 500 of them, have them sent to the museum, 505 NW S8th St. Hangar 33S Fort Worth, Texas 76106. On a separate note, we have a delegation of Belgian military officers coming to the museum tomorrow and they specifically asked to see the CH-21. You may not know this, but when the Pate Museum was closing down, our CH-21 was on the verge of going to a museum in Belgium. Apparently there was some political snafu and the deal fell through for the Belgians, thus leaving Shaky available for us to acquire. They wanted the CH-21 for the Belgian military museum to represent the ones that they used during the Congo Revolt in the 1960's (Congo was a Belgian colony once upon a time). So it will be interesting to hear what the Belgian Military delegation has to say when they tour the museum tomorrow. Jimbos Note"I was dealing with a Michel Huart from Belgium on their museum project, last I heard from him was that Shaky was supposed to be loaded on a USAF C-5 headed for their museum. Haven't heard any more from him, you know the rest of the story :)"
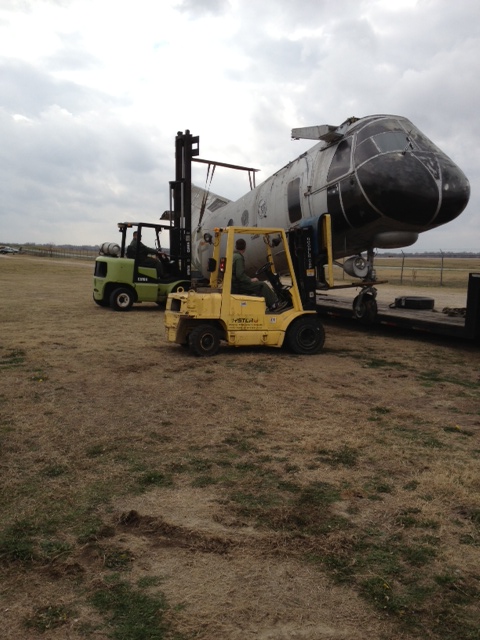
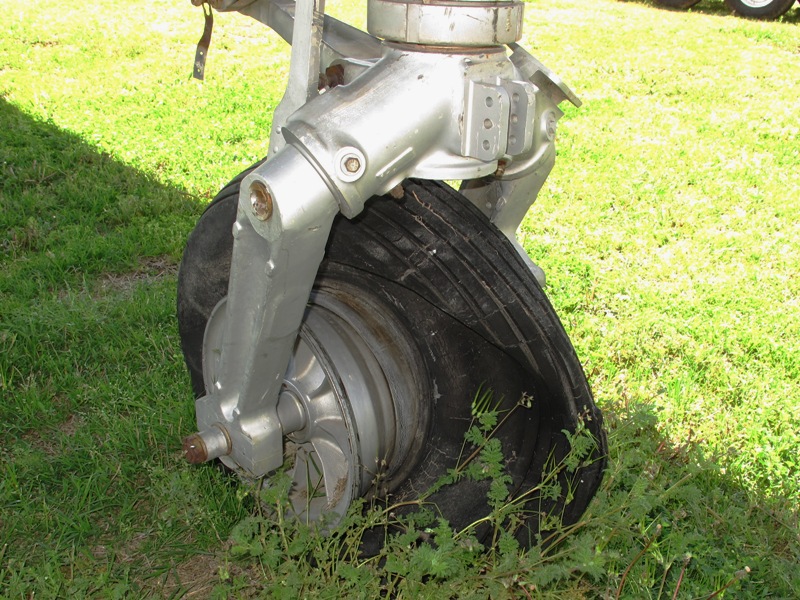
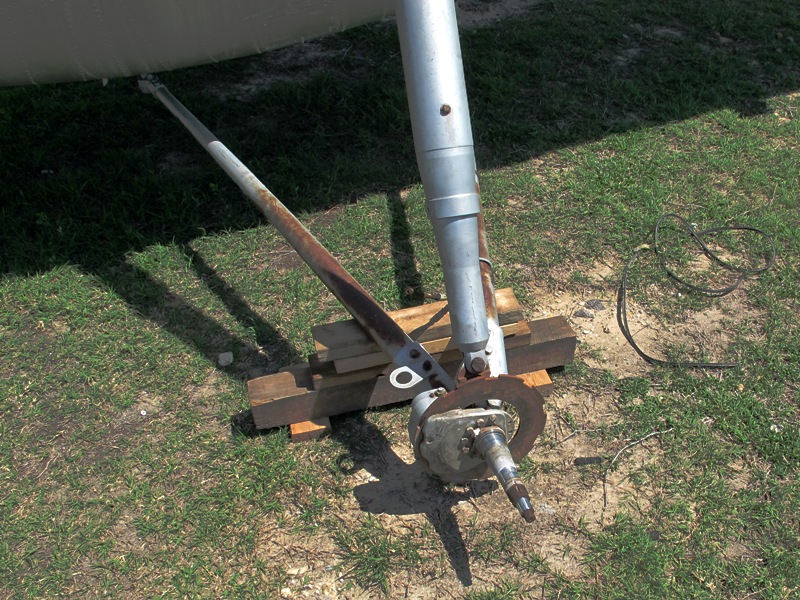
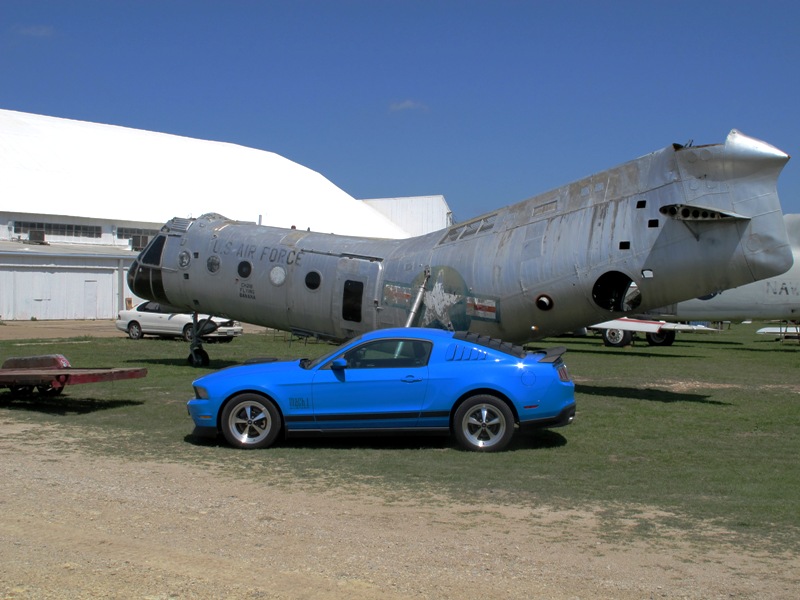
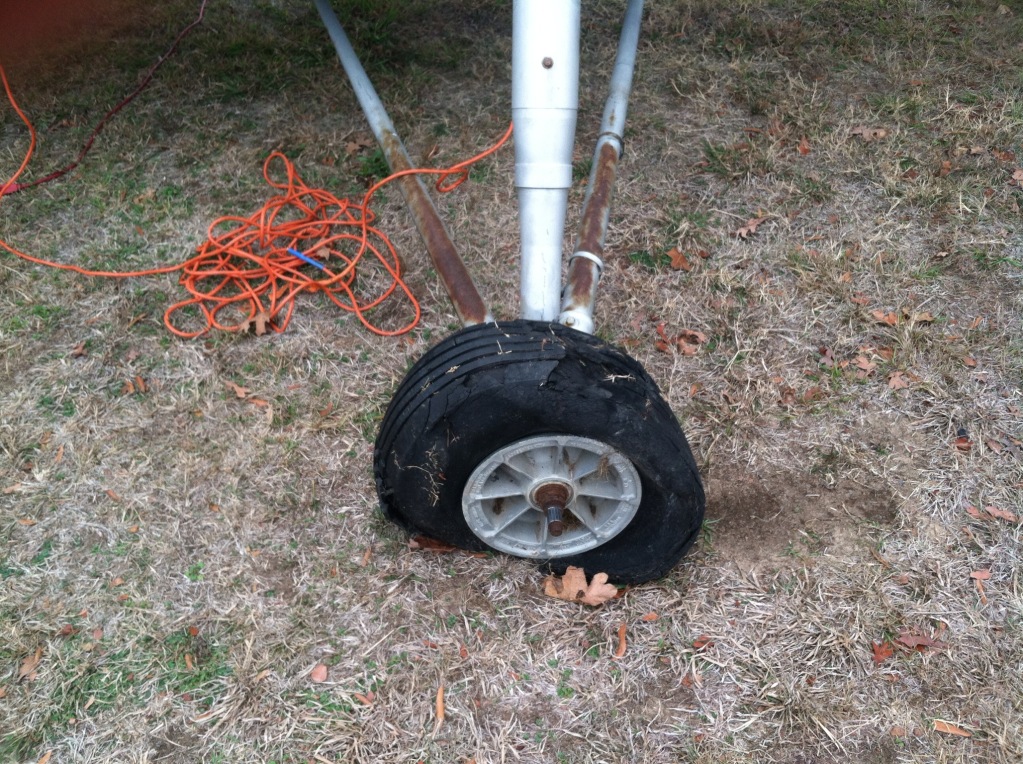
So come on out and get your hands on some history!! Bill Gorin Shaky's Got a New Pair of Shoes! It took longer than we thought, but today Shaky Magoo is sitting on a 'new' pair of tires! As I mentioned in a previous update, we were able to get a set of good used tires donated to the project for just the $35.00 shipping costs. Today we got all three tires installed. Bob Roth, my son Brian and I worked off and on over the last couple of months to remove the mains, clean, prime and repaint the wheels then install the new tires. Bob had reassembled the main wheels and tires, all that was left to pack the bearings and install them on the helo. I managed to get that done and then I removed the nose wheel. Bob, Brian and I then went to work replacing the tire. We elected to not repaint the wheel since it was in good shape and we wanted to get the tire changed so that she would be mobile once again. We got the tire changed and reinstalled (that is one weird nose axle by the way!). One of you CH-21 experts will have to explain that thing to Bob and I one day! The nose wheel and tire is now reinstalled and she's ready to move inside the hangar. We found out that the universal tow bar that we got with the A-3 Skywarrior will work for towing the CH-21, see the above photo.
We won't be able to move her inside until the weekend of June 1-2 due to a big cleanup project at the museum next weekend (feel free to come out an lend a hand!). What we will have to do is: Pull the center line of planes out of the hangar (Cessna 140, T-6, Beech 18, T-33 and F-86) Position the CH-21 on the East side of the hangar, parallel to the hangar doors (with approx 4'-6' from the doors) Reposition the above mentioned aircraft back in the hangar (trust me it sounds easier than it is)


I am considering facing these airplanes to the NW instead of to the SW as they are now, I think this will make it easier to get them out and look better to visitors
Once inside the real work begins. As we have laid out in our project plan-see above, we want to remove all the panels, floorboards and interior so that we can begin a thorough cleaning and restoration. We need to get or make some parts racks and/or shelves to put everything on once we remove it.
Come on out and lend a hand, we're going to need some help moving airplanes and getting her set up to work on. Also, we need to get the maintenance and parts manuals printed off, they are each over 500 pages and the maintenance manual does have some color diagrams in it, so it would be nice to get it printed in color. This will cost several hundred dollars to get printed, if anyone has any connections to get them printed for free or at a great discount let me know and we'll get them printed, otherwise we need donations to help pay for the printing.
Thanks everyone for hanging in there, I know that things slowed down there for a while. We got busy with some high priority projects around the museum as well as just other things in life that occupy our time. We are primed push forward and move this project to the next big step, but we need your help to make it happen!
Bill Gorin
Chief of Maintenance
bill.gorin@gmail.com
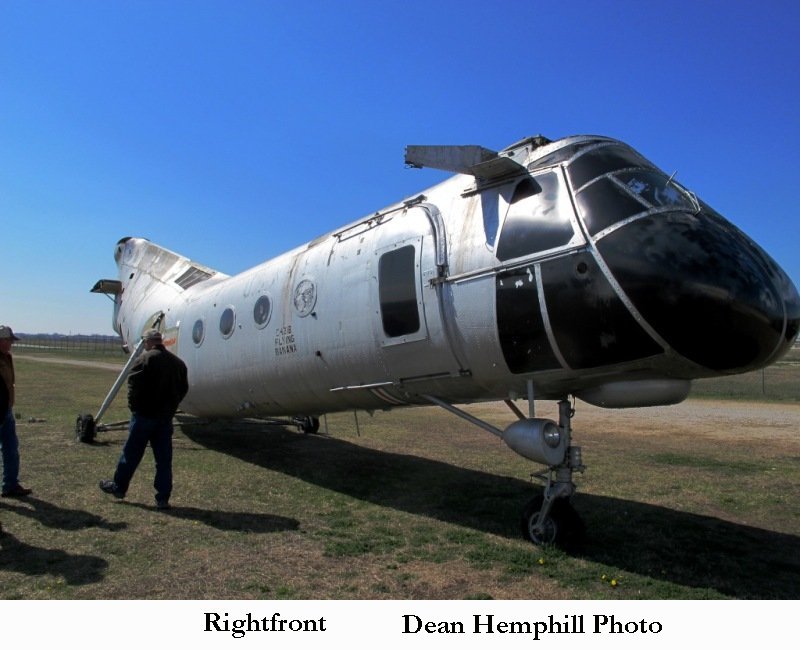
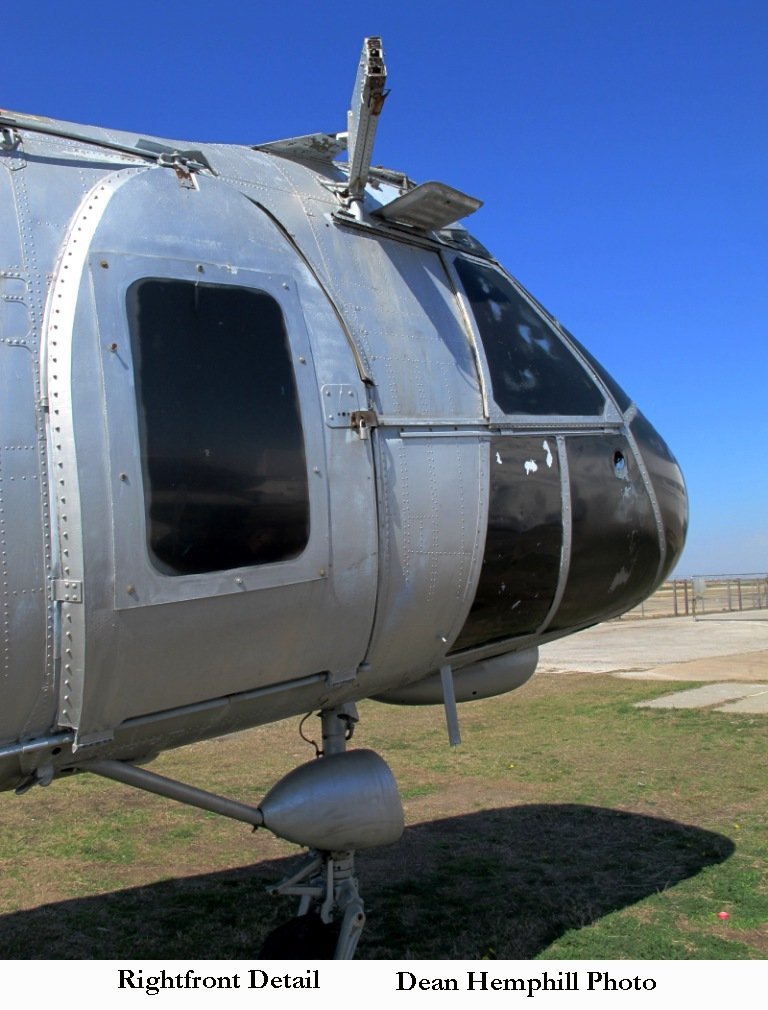
3 MAR 2013 Photos


![]()

VFM website-- http://www.vintageflyingmuseum.org/
If you don't live local to the Dallas/Fort Worth area and would like to contribute and also see where your money is going, please donate, then check out Warbird Information Exchange forum. I will be posting regular updates as the restoration progresses complete with as many photos as possible.
http://warbirdinformationexchange.org/phpBB3/viewtopic.php?f=3&t=48170&hilit=Flying+Banana
Bill Gorin

© 2013-ASAPMH, 1370th.org, and AFPMA